You have no items in your shopping cart.

How to Configure Cisco ASA Firewall: Step-by-Step Guide
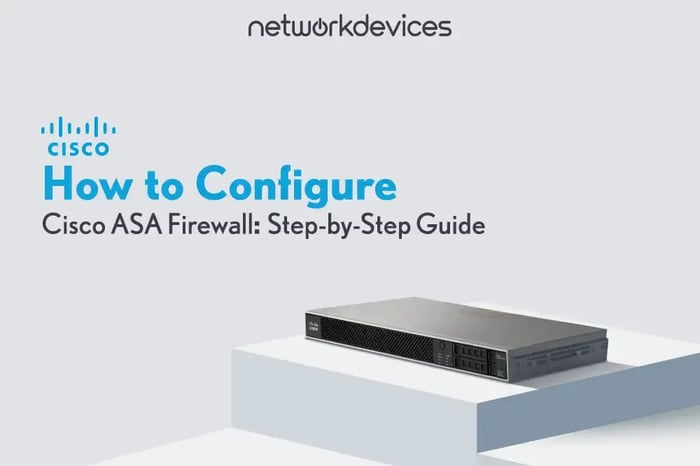
Configuring a Cisco ASA firewall is an essential step in securing your network against threats. This guide walks you through the fundamental setup procedures, including IP address assignment, interface security levels, and management access methods.
Whether you're deploying it for a small office or an enterprise network, mastering these steps ensures a secure and optimized firewall configuration.
Overview of Cisco ASA Firewalls
Cisco ASA firewalls are unified security devices that provide robust protection by combining firewall, VPN, intrusion prevention, and content inspection capabilities. Since its launch in 2005, Cisco ASA devices have evolved to support advanced network security solutions, replacing legacy technologies such as Cisco PIX Firewalls, VPN 3000 Series Concentrators, and IPS 4200 Series.
Key Features of Cisco ASA
The Cisco ASA Firewall is a stateful firewall supporting AAA-based user authentication, deep application inspection with Modular Policy Framework (MPF), and VPN protocols like IPSec, SSL, and PPTP.
Key features include virtual firewalls (security contexts), web-based management via ASDM, transparent Layer 2 mode, complete failover (active-standby/active-active), IPv6 routing, clustering for appliance grouping, and VPN load balancing for scalability.
- Stateful Firewall – Tracks active connections for dynamic traffic control.
- VPN Support – Enables IPSec, SSL, and PPTP for secure remote access.
- AAA Authentication – Supports TACACS+, RADIUS, and local user authentication.
- Deep Packet Inspection – Inspects traffic using a Modular Policy Framework (MPF).
- High Availability & Failover – Supports active standby and active-active redundancy.
- IPv6 & Clustering – Scalable deployment with full IPv6 compatibility.
- Web-Based Management – Manage through Cisco ASDM (Adaptive Security Device Manager).
Configuring Cisco ASA Overview
Cisco ASA supports Routed Mode (default mode) and Transparent Mode. In Routed Mode, the ASA operates as a Layer 3 device, routing traffic between networks. In Transparent Mode, the ASA acts as a Layer 2 firewall, filtering traffic without altering IP addresses.
Configuring a Cisco ASA firewall requires setting up essential components such as interfaces, security policies, and remote access. The process starts with configuring the management interface to allow secure administration access.
Once the management interface is established, you can begin configuring firewall rules, NAT, VPN, and other security features. For this article, we assume that the ASA is in routed mode.
Cisco ASA Management Access Approaches
For initial setup, you can connect to a Cisco ASA using the console port with a terminal emulator (e.g., Putty). You use SSH or ASDM (Adaptive Security Device Manager) for network-based management.
You assign an IP address to the management interface and enable remote access. The web-based ASDM method requires enabling the HTTP server and accessing the ASA via a browser.
1. Set up SSH for the Management Interface
In the first step, we must configure the ASA’s management interface. To do this, connect to the ASA through the console port using a terminal emulator, such as Putty. The management interface enables administrators to access the ASA for configuration and monitoring.
After configuring the management interface, you can use SSH, telnet, and ASDM to connect the management interface. The telnet is not secure, and we configured SSH as the first step to connect ASA via the management interface. Follow these steps to set it up:
a. Configure hostname and domain name:
ciscoasa# configure terminal
ciscoasa(config)# hostname ASA-1
ASA-1(config)# domain-name vodanetsystems.local
b. Configure username and password for login
ASA-1(config)# username admin password password privilege 15c. Enable Local Authentication for SSH Access:
ASA-1(config)# aaa authentication enable console LOCAL
ASA-1(config)# aaa authentication ssh console LOCAL
d. Assign an IP address to the management interface (e.g., Management0/0)
ASA-1(config-if)# interface management 0/0
ASA-1(config-if)# ip address Ip_address Subnet_Mask
ASA-1(config-if)# nameif MGMT
ASA-1(config-if)# no shutdown
e. Allow SSH access from a specific network:
In this command, indicate the network and subnet mask permitted to access the ASA via SSH, followed by the interface name defined by the nameif the interface sub-command of Management Interface.
ASA-1(config)# ssh Ip_address Subnet_Mask MGMT f. Generate RSA Key Pair
ASA-1(config)# crypto key generate rsa modulus 2048The modulus 2048 specifies the key size (2048 bits are recommended for security).
ASA-1(config)# show crypto key mypubkey rsag. useful commands
show ssh
show ssh session
 show running-config interface management 0/0
show hostname
show crypto key mypubkey rsa
show ssh ciphers
show running-config aaa authentication
show running-config ssh
2. Set up ASDM for the Management Interface
This step is brief because in the previous step, we created a username, password, and SSH keys and set the IP address for the management interface.
Cisco's ASDM is a comprehensive management and configuration tool for Cisco ASA devices. It is included with ASA and provides a GUI, streamlining the management of Cisco ASA appliances through an easy-to-use, web-based interface for network administrators.
Key features of ASDM include:
- Easy-to-use GUI: Enables quick configuration and monitoring of Cisco ASA firewalls.
- Troubleshooting capabilities: Allows network administrators to troubleshoot Cisco firewall appliances efficiently.
- User-friendly interface: Designed to provide easy access to the many features supported by ASA, including a menu bar for quick access to files, tools, and wizards.
Follow these steps to set it up:
ASA-1(config)# aaa authentication http console LOCAL
ASA-1(config)# http server enable
ASA-1(config)# http Ip_address Subnet_Mask MGMT.
The command http Ip_address Subnet_Mask indicates the network and subnet mask permitted to access the ASA via ASDM. After that, open your browser and go to the Management Interface's IP address. Use the HTTPS protocol: Click the Install ASDM Launcher and Run ASDM buttons to install ASDM.
https://xxx.xxx.xxx.xxx3. Traffic Handle by the Cisco ASA Management Interface
The Management Interface (Management0/0) on a Cisco ASA is primarily designed for out-of-band (OOB) management and is not meant to handle regular data traffic. However, depending on the configuration, it routes specific types of traffic.
Traffic Routed by Default:
- Administrative Traffic (Allowed by Default)
- SSH, Telnet (if enabled), and ASDM (HTTPS) access.
- SNMP queries for network monitoring.
- Syslog messages are sent to a remote logging server.
- AAA (TACACS+/RADIUS) authentication requests.
- NTP (Network Time Protocol) for time synchronization.
- Management Services Traffic
- FTP/TFTP for software upgrades.
- DNS queries for hostname resolution.
- DHCP traffic if the ASA is configured as a client.
Note: Cisco ASA supports management-only interface commands to isolate management traffic from data traffic. When the management-only command is enabled on an interface Management, Regular (User Data) traffic routing through this interface is disabled, meaning it is exclusively for management purposes only.
Regular data traffic between internal and external networks and Traffic forwarded through dynamic or static routing are disabled via management interface width default behavior. You can change the default behavior with the command:
ASA-1(config)# interface management0/0
ASA-1(config-if)# no management-only
Here are the best practices you can implement when configuring the management interface.
- Keep the interface isolated from production traffic.
- Use ACLs to limit access to trusted IPs only.
- Enable AAA (TACACS+/RADIUS) for authentication.
- Always use SSH instead of Telnet for secure remote access.
- If using SNMP, restrict it to read-only access.
Understanding Cisco ASA Security Zones and Levels
Security Zoning Fundamentals
Security zones form the cornerstone of Cisco ASA firewall security policies. These logical entities:
- Link to physical or logical interfaces
- Establish security boundaries
- Control traffic flow
- Enforce security policies
Cisco ASA Security Levels Explained
Cisco ASA implements a unique approach to interface security using numeric trust levels:
Security Level Range: 0-100 (integer values)
Trust Hierarchy:
- Level 100: Highest trust
- Level 0: No trust
- Custom levels: Flexible trust assignments
Default Traffic Flow Rules
1. Higher to Lower Security:
- Allowed by default
- Example: Inside (100) → DMZ (50)
2. Lower to Higher Security:
- Denied by default
- Requires explicit ACL permissions
- Example: DMZ (50) → Inside (100)
3. Same Security Level:
- Denied by default
- Enable with: same-security-traffic permit inter-interface
4. U-turn Traffic:
- Traffic entering and exiting same interface
- Denied by default
- Enable with: same-security-traffic permit intra-interface
Standard Interface Names and Security Levels
Cisco ASA uses conventional interface names with default security levels:
Default Security Zones
1. Inside Interface:
- Security Level: 100
- Purpose: Internal network
- Highest trust level
2. DMZ Interface:
- Security Level: 50
- Purpose: Public-facing servers
- Medium trust level
3. Outside Interface:
- Security Level: 0
- Purpose: Internet connectivity
- No trust level
Interface Configuration Example
Copy
! Configure inside interface
ASA-1(config)# interface GigabitEthernet0/1
ASA-1(config-if)# nameif inside
ASA-1(config-if)# security-level 90    ! Custom level (default is 100)
Traffic Flow Examples
Common security level interactions:
- Inside (100) → DMZ (50): Allowed
- DMZ (50) → Inside (100): Blocked
- DMZ (50) → Outside (0): Allowed
- Outside (0) → DMZ (50): Blocked
Interface Naming Requirements
Key points about interface naming:
- Mandatory for interface operation
- Used in security policies and ACLs
- Simplifies firewall management
- References logical names, not physical ports
Security Level Assignment Rules
- Automatic Assignment:
- nameif inside → Level 100
- nameif outside → Level 0
- nameif dmz → Level 50
- Manual Override: Available through security-level command
Summary
In this article, we discussed configuring the Management interface and the concept of security zoning. This article provides essential knowledge for implementing Cisco ASA in the network. Now, you have a solid understanding of Cisco ASA. In the following article, we will discuss access lists (ACLs) and then use a lab to demonstrate how to implement them.


